NOTE: Apart from
 (and even then it's questionable, I'm Scottish). These are machine translated in languages I don't read. If they're terrible please contact me.
You can see how this translation was done in this article.


Thursday, 08 August 2024
//5 minute read
One of the things that annoyed me about my current setup was having to use Google Analytics to get visitor data (what little there is of it ??). So I wanted to find something I could self-host that didn't pass data to Google or any other third party. I found Umami which is a simple, self-hosted web analytics solution. It's a great alternative to Google Analytics and is (relatively) easy to set up.
Installation is PRETTY simple but took a fair bit of fiddling to really get going...
As I wanted to add Umami to my current docker-compose setup I needed to add a new service to my docker-compose.yml file. I added the following to the bottom of the file:
  umami:
    image: ghcr.io/umami-software/umami:postgresql-latest
    env_file: .env
    environment:
      DATABASE_URL: ${DATABASE_URL}
      DATABASE_TYPE: ${DATABASE_TYPE}
      HASH_SALT: ${HASH_SALT}
      APP_SECRET: ${APP_SECRET}
      TRACKER_SCRIPT_NAME: getinfo
      API_COLLECT_ENDPOINT: all
    ports:
      - "3000:3000"
    depends_on:
      - db
    networks:
      - app_network
    restart: always
  db:
    image: postgres:16-alpine
    env_file:
      - .env
    networks:
      - app_network
    healthcheck:
      test: ["CMD-SHELL", "pg_isready -U ${POSTGRES_USER}"]
      interval: 5s
      timeout: 5s
      retries: 5
    volumes:
      - /mnt/umami/postgres:/var/lib/postgresql/data
    restart: always
  cloudflaredumami:
    image: cloudflare/cloudflared:latest
    command: tunnel --no-autoupdate run --token ${CLOUDFLARED_UMAMI_TOKEN}
    env_file:
      - .env
    restart: always
    networks:
      - app_network
This docker-compose.yml file contains the following setup:
umami which uses the ghcr.io/umami-software/umami:postgresql-latest image. This service is used to run the Umami analytics service.db which uses the postgres:16-alpine image. This service is used to run the Postgres database that Umami uses to store its data.
Note for this service I'm mapped it to a directory on my server so that the data is persisted between restarts. volumes:
- /mnt/umami/postgres:/var/lib/postgresql/data
You'll need this director to exist and be writable by the docker user on your server (again not a Linux expert so 777 is likely overkill here!).
chmod 777 /mnt/umami/postgres
cloudflaredumami which uses the cloudflare/cloudflared:latest image. This service is used to tunnel the Umami service through Cloudflare to allow it to be accessed from the internet.To support this I also updated my .env file to include the following:
CLOUDFLARED_UMAMI_TOKEN=<cloudflaretoken>
DATABASE_TYPE=postgresql
HASH_SALT=<salt>

POSTGRES_DB=postgres
POSTGRES_USER=<postgresuser>
POSTGRES_PASSWORD=<postgrespassword>
UMAMI_SECRET=<umamisecret>

APP_SECRET=${UMAMI_SECRET}
UMAMI_USER=${POSTGRES_USER}
UMAMI_PASS=${POSTGRES_PASSWORD}
DATABASE_URL=postgresql://${UMAMI_USER}:${UMAMI_PASS}@db:5432/${POSTGRES_DB}
This sets up the configuration for the docker compose (the <> elemets obviously need replacing with your own values). The cloudflaredumami service is used to tunnel the Umami service through Cloudflare to allow it to be accessed from the internet. It's POSSIBLE to use a BASE_PATH but for Umami it annoyingly needs a rebuild to change the base path so I've left it as the root path for now.
To set up the cloudflare tunnel for this (which acts as the path for the js file used for analytics - getinfo.js) I used website:
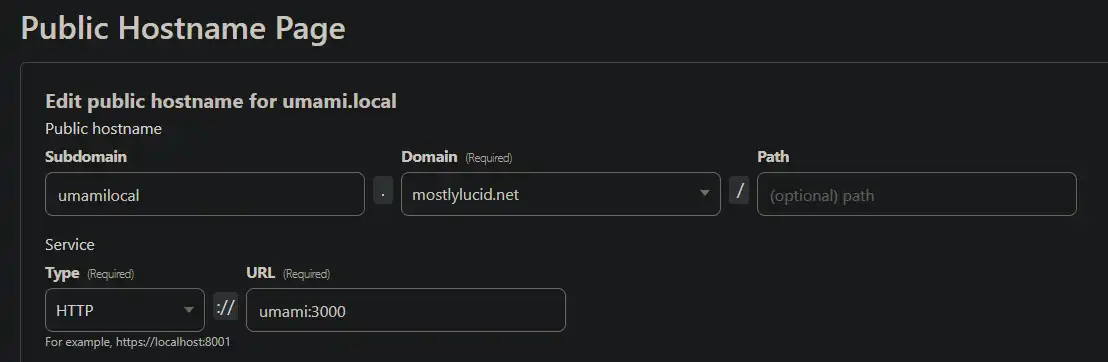
This sets up the tunnel to the Umami service and allows it to be accessed from the internet. Note, I point this to the umami service in the docker-compose file (as it's on the same network as the cloudflared tunnel it's a valid name).
To enable the path for the script (called getinfo in my setup above) I've added a config entry to my appsettings
"Analytics":{
"UmamiPath" : "https://umamilocal.mostlylucid.net/getinfo",
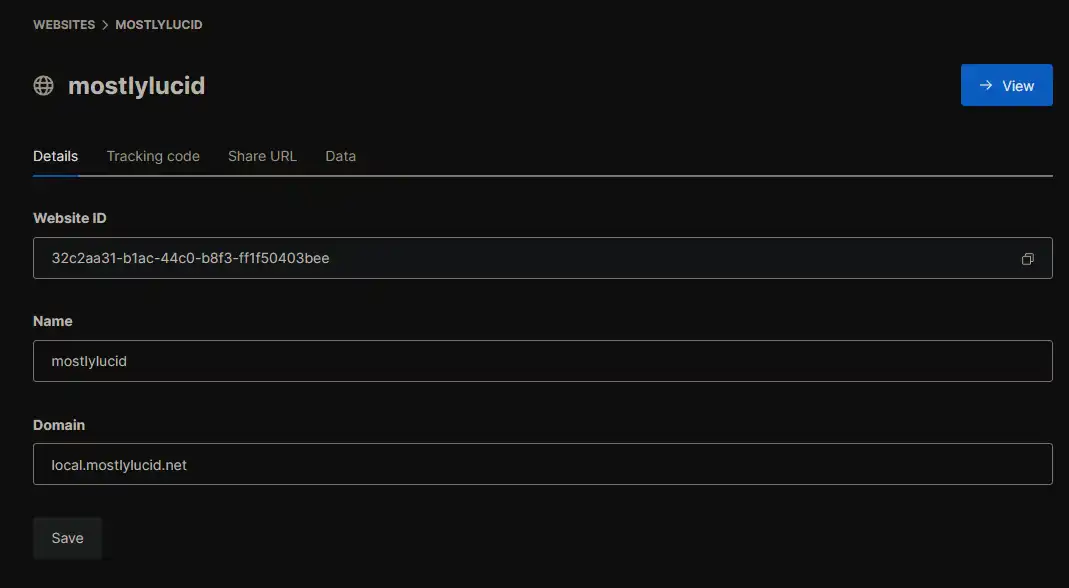
"WebsiteId" : "32c2aa31-b1ac-44c0-b8f3-ff1f50403bee"
},
You can also add these to your .env file and pass them in as environment variables to the docker-compose file.
ANALYTICS__UMAMIPATH="https://umamilocal.mostlylucid.net/getinfo"
ANALYTICS_WEBSITEID="32c2aa31-b1ac-44c0-b8f3-ff1f50403bee"
  mostlylucid:
    image: scottgal/mostlylucid:latest
    ports:
      - 8080:8080
    restart: always
    environment:
    ...
      - Analytics__UmamiPath=${ANALYTICS_UMAMIPATH}
      - Analytics__WebsiteId=${ANALYTICS_WEBSITEID}
You set up the WebsiteId in the Umami dashboard when you set up the site. (Note the default username and password for the Umami service is admin and umami, you NEED to change these after setup).
With the associated settings cs file:
public class AnalyticsSettings : IConfigSection
{
    public static string Section => "Analytics";
    public string? UmamiPath { get; set; }
}
Again this uses my POCO config stuff (here) to set up the settings. Set it up in my program.cs:
builder.Configure<AnalyticsSettings>();
AND finally in my BaseController.cs OnGet method I've added the following to set the path for the analytics script:
   public override void OnActionExecuting(ActionExecutingContext filterContext)
    {
        if (!Request.IsHtmx())
        {
            ViewBag.UmamiPath = _analyticsSettings.UmamiPath;
            ViewBag.UmamiWebsiteId = _analyticsSettings.WebsiteId;
        }
        base.OnActionExecuting(filterContext);
    }
This sets the path for the analytics script to be used in the layout file.
Finally, I've added the following to my layout file to include the analytics script:
<script defer src="@ViewBag.UmamiPath" data-website-id="@ViewBag.UmamiWebsiteId"></script>
This includes the script in the page and sets the website id for the analytics service.
In order to exclude your own visits from the analytics data you can add the following local storage in your browser:
In Chrome dev tools (Ctrl+Shift+I on windows) you can add the following to the console:
localStorage.setItem("umami.disabled", 1)
This was a bit of a faff to set up but I'm happy with the result. I now have a self-hosted analytics service that doesn't pass data to Google or any other third party. It's a bit of a pain to set up but once it's done it's pretty easy to use. I'm happy with the result and would recommend it to anyone looking for a self-hosted analytics solution.
