This is a viewer only at the moment see the article on how this works.
To update the preview hit Ctrl-Alt-R (or ⌘-Alt-R on Mac) or Enter to refresh. The Save icon lets you save the markdown file to disk
This is a preview from the server running through my markdig pipeline
我认为添加一点很有趣的一点 就是用现场的标记来查看 网站上的文章的记分率。 这是一个简单的标记编辑器, 使用 SimmondMDE 和服务器侧面, 使用 markkdig 库进行标记, 我用这个库来制作这些博客文章 。
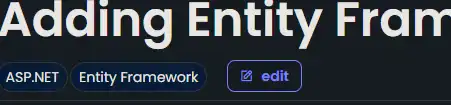
在分类列表旁边的博客文章标题中,您现在可以看到“ 编辑” 按钮
 .. 如果您点击此选项, 您将会得到一个页面, 该页面将有一个标记编辑器和标记预览 。 您可以编辑标记, 并看到实时的更改( 点击 Ctrl- Alt- R (或在 Mac 上 - Alt- R ) 或 Enter 键以刷新 ) 。 您也可以按下 按钮将标记减慢文件保存到本地机器中。
当然,这不会将文件保存到服务器上, 它只是将文件下载到您的本地机器上。 我不会让你编辑我的博客文章!
[技选委
Javascript是相当简单化 我刚刚把它留在了 scripts 段 次 页 次 Edit.cshtml 目前页面上的页数 。
        window.addEventListener('load', function () {
            console.log('Page loaded without refresh');

            // Trigger on change event of SimpleMDE editor
            window.simplemde.codemirror.on("keydown", function(instance, event) {
            let triggerUpdate= false;
                // Check if the Enter key is pressed
                if ((event.ctrlKey || event.metaKey) && event.altKey && event.key.toLowerCase() === "r") {
                    event.preventDefault(); // Prevent the default behavior (e.g., browser refresh)
                    triggerUpdate = true;
                    }
                    if (event.key === "Enter")
                    {
                        triggerUpdate = true;
                    }

                if (triggerUpdate) {

                    var content = simplemde.value();

                    // Send content to WebAPI endpoint
                    fetch('/api/editor/getcontent', {
                        method: 'POST',
                        headers: {
                            'Content-Type': 'application/json'
                        },
                        body: JSON.stringify({ content: content })  // JSON object with 'content' key
                    })
                        .then(response => response.json())  // Parse the JSON response
                        .then(data => {
                            // Render the returned HTML content into the div
                            document.getElementById('renderedcontent').innerHTML = data.htmlContent;
                            document.getElementById('title').innerHTML  = data.title;// Assuming the returned JSON has an 'htmlContent' property
                            const date = new Date(data.publishedDate);

                            const formattedDate = new Intl.DateTimeFormat('en-GB', {
                                weekday: 'long',  // Full weekday name
                                day: 'numeric',   // Day of the month
                                month: 'long',    // Full month name
                                year: 'numeric'   // Full year
                            }).format(date);

                            document.getElementById('publishedDate').innerHTML = formattedDate;
                           populateCategories(data.categories);


                            mermaid.run();
                            hljs.highlightAll();
                        })
                        .catch(error => console.error('Error:', error));
                }
            });

            function populateCategories(categories) {
                var categoriesDiv = document.getElementById('categories');
                categoriesDiv.innerHTML = ''; // Clear the div

                categories.forEach(function(category) {
                    // Create the span element
                    let span = document.createElement('span');
                    span.className = 'inline-block rounded-full dark bg-blue-dark px-2 py-1 font-body text-sm text-white outline-1 outline outline-green-dark dark:outline-white'; // Apply the style class
                    span.textContent = category;

                    // Append the span to the categories div
                    categoriesDiv.appendChild(span);
                });
            }
        });
正如你将看到这个触发器 load 活动,然后收听 keydown SimpleMDE 编辑器上的事件 。 如果按下键是 Ctrl-Alt-R 或 Enter 然后它将编辑器的内容发送到 WebAPI 端点, 从而进行标记并返回 HTML 。 然后,它变成圆形的, renderedcontent (div) div.
由于我的博客文章在 BlogPostViewModel 然后对返回的JSON进行剖析,并填充标题、公布的日期和类别。 也运行着 mermaid 和 highlight.js 库可以生成任何图表和代码块。
首先,我加了一个新的控制器 EditorController 单一项行动,即: Edit 返回 Edit.cshtml 视图。
       [HttpGet]
    [Route("edit")]
    public async Task<IActionResult> Edit(string? slug = null, string language = "")
    {
        if (slug == null)
        {
            return View("Editor", new EditorModel());
        }

        var blogPost = await markdownBlogService.GetPageFromSlug(slug, language);
        if (blogPost == null)
        {
            return NotFound();
        }

        var model = new EditorModel { Markdown = blogPost.OriginalMarkdown, PostViewModel = blogPost };
        return View("Editor", model);
    }
你会看到,这很简单, 它使用新的方法在 I MarkdownBlog Servicice 上 来从子弹上获取博客文章,然后返回 Editor.cshtml 视图 EditorModel 中包含标记和 BlogPostViewModel.
缩略 Editor.cshtml 视图视图是一个简单的页面,带有 textarea 标记和标记 div 以已实现的记分。 也有一个 button 将标记保存到本地机器上。
@model Mostlylucid.Models.Editor.EditorModel

<div class="min-h-screen bg-gray-100">
    <p class="text-blue-dark dark:text-blue-light">This is a viewer only at the moment see the article <a asp-action="Show" asp-controller="Blog" asp-route-slug="markdownprevieweditor" class="text-blue-dark dark:text-blue-light">on how this works</a>.</p>
    <div class="container mx-auto p-0">
        <p class="text-blue-dark dark:text-blue-light">To update the preview hit Ctrl-Alt-R (or ⌘-Alt-R on Mac) or Enter to refresh. The Save <i class="bx bx-save"></i> icon lets you save the markdown file to disk </p>
        <div class="grid grid-cols-1 md:grid-cols-2 gap-6">
            <!-- Column 1 -->
            <div class="bg-white dark:bg-custom-dark-bg  p-0 rounded shadow-md">
                <textarea class="markdowneditor hidden" id="markdowneditor">@Model.Markdown</textarea>

            </div>

            <!-- Column 2 -->
            <div class="bg-white dark:bg-custom-dark-bg p-0 rounded shadow-md">
                <p class="text-blue-dark dark:text-blue-light">This is a preview from the server running through my markdig pipeline</p>
                <div class="border-b border-grey-lighter pb-2 pt-2 sm:pb-2" id="categories">
                    @foreach (var category in Model.PostViewModel.Categories)
                    {
                        <span
                            class="inline-block rounded-full dark bg-blue-dark px-2 py-1 font-body text-sm text-white outline-1 outline outline-green-dark dark:outline-white">@category</span>

                    }
                </div>
                <h2 class="pb-2 block font-body text-3xl font-semibold leading-tight text-primary dark:text-white sm:text-3xl md:text-3xl" id="title">@Model.PostViewModel.Title</h2>
                <date id="publishedDate" class="py-2">@Model.PostViewModel.PublishedDate.ToString("D")</date>
                <div class="prose prose max-w-none border-b py-2 text-black dark:prose-dark sm:py-2" id="renderedcontent">
                    @Html.Raw(Model.PostViewModel.HtmlContent)
                </div>
            </div>
        </div>
    </div>
</div>
试图让这篇文章尽可能接近实际的博客文章。 也有一个 script 底部区域, 包含我先前显示的 JavaScript 代码 。
WebAPI 的此点的端点仅取下标记内容, 并返回完成的 HTML 内容 。 很简单,只是使用 IMarkdownService 进行标记。
 [Route("api/editor")]
[ApiController]
public class Editor(IMarkdownBlogService markdownBlogService) : ControllerBase
{
    public class ContentModel
    {
        public string Content { get; set; }
    }

    [HttpPost]
    [Route("getcontent")]
    public IActionResult GetContent([FromBody] ContentModel model)
    {
        var content =  model.Content.Replace("\n", Environment.NewLine);
        var blogPost = markdownBlogService.GetPageFromMarkdown(content, DateTime.Now, "");
        return Ok(blogPost);
    }
}
这很简单,只是返回 BlogPostViewModel 以那部经 JavaScript 和 renderedcontent (div) div.
这是一个预览标记内容的简单方法, 我认为这是对网站的一个很好的补充。 我肯定有更好的方法来做这个 但是这个对我管用 我希望你认为它有用,如果有任何改进建议,请通知我。
