This is a viewer only at the moment see the article on how this works.
To update the preview hit Ctrl-Alt-R (or ⌘-Alt-R on Mac) or Enter to refresh. The Save icon lets you save the markdown file to disk
This is a preview from the server running through my markdig pipeline
In deze app wilde ik een simple mechanisme van het toestaan van login om opmerkingen (en sommige admin taken) toe te voegen aan de app. Ik wilde Google Auth hiervoor gebruiken. Ik wilde hiervoor de ASP.NET Identity database niet gebruiken. Ik wilde de app zo eenvoudig mogelijk houden voor zo lang mogelijk.
Databanken zijn een krachtig onderdeel van elke toepassing, maar ze voegen ook complexiteit toe. Ik wilde die complexiteit vermijden totdat ik het echt nodig had.
Eerst moet je Google Auth instellen in de Google Developer Console. U kunt de stappen volgen in deze link om uw gegevens voor u in te stellen Google Client ID en Secret.
Zodra u uw Google Client ID en Secret, kunt u ze toevoegen aan uw appsettings.json bestand.
    "Auth" :{
"GoogleClientId": "",
"GoogleClientSecret": ""
}
Hoe dan ook moet u deze niet in te checken om de bron controle. In plaats daarvan voor lokale ontwikkeling kunt u het Geheimenbestand gebruiken:
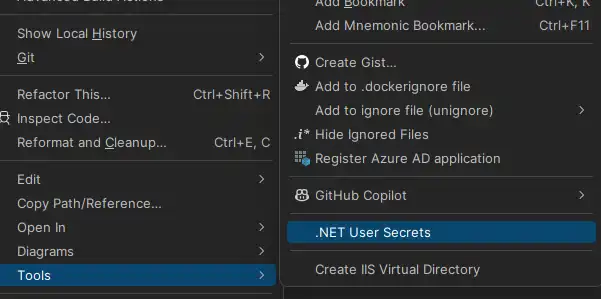
Daarin kunt u uw Google Client ID en Secret toevoegen (let op dat uw client Id niet echt vertrouwelijk is, zoals u later zult zien is het opgenomen in de JS call aan de voorkant.
    "Auth" :{
  "GoogleClientId": "ID",
  "GoogleClientSecret": "CLIENTSECRET"
}
Opmerking Ik gebruik een aangepaste versie van Steve Smith's IConfigSectie (recent beroemd gemaakt door Phil Haack). Dit is om te voorkomen dat de IOptions spullen die ik vind een beetje clunky (en zelden nodig als ik bijna nooit te veranderen config na implementatie in mijn scenario's).
In de mijne doe ik dit waardoor ik de sectienaam van de klas zelf kan krijgen:
namespace Mostlylucid.Config;
public static class ConfigExtensions {
public static TConfig ConfigurePOCO
    var config = new TConfig();
    configuration.Bind(config);
    services.AddSingleton(config);
    return config;
}

public static TConfig Configure<TConfig>(this WebApplicationBuilder builder)
    where TConfig : class, IConfigSection, new() {
    var services = builder.Services;
    var configuration = builder.Configuration;
    var sectionName = TConfig.Section;
    return services.ConfigurePOCO<TConfig>(configuration.GetSection(sectionName));
}


public static TConfig GetConfig<TConfig>(this WebApplicationBuilder builder)
    where TConfig : class, IConfigSection, new() {
    var configuration = builder.Configuration;
    var sectionName = TConfig.Section;
    var section = configuration.GetSection(sectionName).Get<TConfig>();
    return section;

}

public static Dictionary<string, object> GetConfigSection(this IConfiguration configuration, string sectionName) {
    var section = configuration.GetSection(sectionName);
    var result = new Dictionary<string, object>();
    foreach (var child in section.GetChildren()) {
        var key = child.Key;
        var value = child.Value;
        result.Add(key, value);
    }

    return result;
}

public static Dictionary<string, object> GetConfigSection<TConfig>(this WebApplicationBuilder builder)
    where TConfig : class, IConfigSection, new() {
    var configuration = builder.Configuration;
    var sectionName = TConfig.Section;
    return configuration.GetConfigSection(sectionName);
}
}
public interface IConfigSection { public static abstract string Section { get; } }
</details>
Dus mijn Auth ziet eruit als

```csharp
public class Auth : IConfigSection
{
    public static string Section => "Auth";
    public string GoogleClientId { get; set; }
    public string GoogleClientSecret { get; set; }

    public string AdminUserGoogleId { get; set; }

}
Waar ik een statische interface methode gebruik om de sectienaam te krijgen.
Dan in mijn startup kan ik dit doen:
var auth = builder.GetConfig<Auth>();
Hoe dan ook terug naar het google gedoe!
Om dit daadwerkelijk toe te voegen
services.AddCors(options =>
{
    options.AddPolicy("AllowMostlylucid",
        builder =>
        {
            builder.WithOrigins("https://www.mostlylucid.net")
                .WithOrigins("https://mostlylucid.net")
                .WithOrigins("https://localhost:7240")
                .AllowAnyHeader()
                .AllowAnyMethod();
        });
});

builder.Services
    .AddAuthentication(options =>
    {
        options.DefaultScheme = CookieAuthenticationDefaults.AuthenticationScheme;
        options.DefaultChallengeScheme = GoogleDefaults.AuthenticationScheme;


    })
    .AddCookie()
    .AddGoogle(options =>
    {
        options.ClientId = auth.GoogleClientId;
        options.ClientSecret = auth.GoogleClientSecret;
    });
U zult merken dat er CORS ingangen hier, je moet deze ook instellen in de google identiteit console.
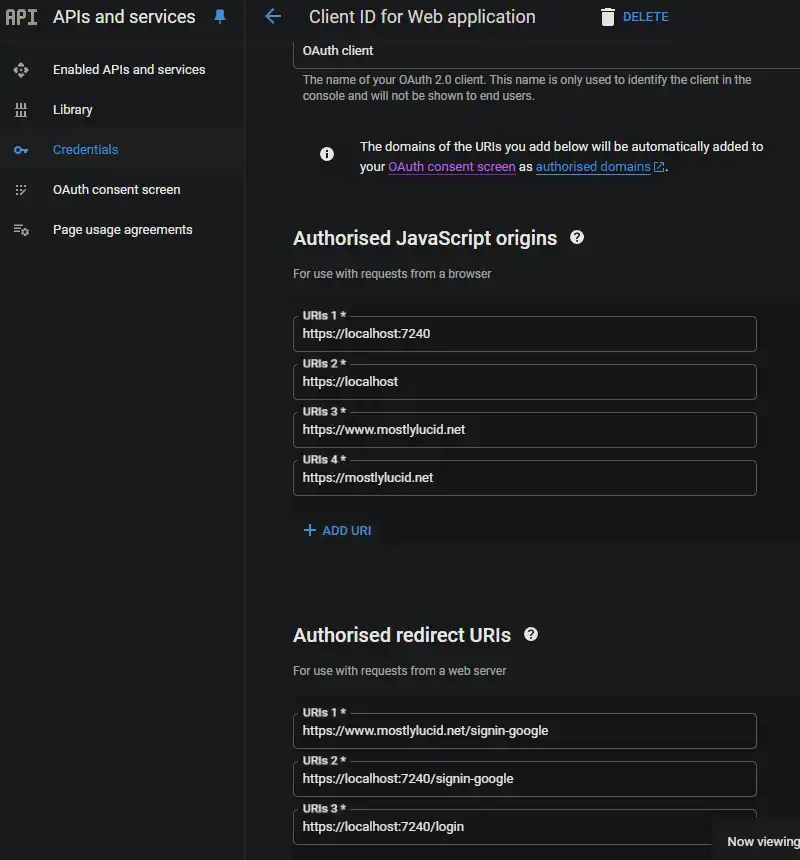
Dit zorgt ervoor dat de Google Auth alleen kan worden gebruikt vanuit de domeinen die u opgeeft.
In mijn _Layout.cshtml Ik heb dit Javascript, dit is waar ik mijn Google Buttons heb ingesteld en een callback heb geactiveerd die de ASP.NET app logt.
<script src="https://accounts.google.com/gsi/client" async defer></script>
Dit is de laag voor de code hieronder
        function renderButton(element)
        {
            google.accounts.id.renderButton(
                element,
                {
                    type: "standard",
                    size: "large",
                    width: 200,
                    theme: "filled_black",
                    text: "sign_in_with",
                    shape: "rectangular",
                    logo_alignment: "left"
                }
            );
        }
        function initGoogleSignIn() {
            google.accounts.id.initialize({
                client_id: "839055275161-u7dqn2oco2729n6i5mk0fe7gap0bmg6g.apps.googleusercontent.com",
                callback: handleCredentialResponse
            });
            const element = document.getElementById('google_button');
            if (element) {
                renderButton(element);
            }
            const secondElement = document.getElementById('google_button2');
            if (secondElement) {
                renderButton(secondElement);
            }

        }

        function handleCredentialResponse(response) {
            if (response.credential) {
                const xhr = new XMLHttpRequest();
                xhr.open('POST', '/login', true);
                xhr.setRequestHeader('Content-Type', 'application/json');
                xhr.onload = function () {
                    if (xhr.status === 200) {
                        window.location.reload();
                    } else {
                        console.error('Failed to log in.');
                    }
                };
                xhr.send(JSON.stringify({ idToken: response.credential }));
            } else {
                console.error('No credential in response.');
            }
        }

        window.onload = initGoogleSignIn;
Hier zie je dat ik tot twee div elementen in de pagina heb met de id google_button en google_button2. Dit zijn de elementen waarin de Google JS de knoppen zal maken.
TIP: Als u Tailwind gebruikt, kunt u de knop div shinken om correct te werken in de donkere modus (anders geeft het een witte achtergrond rond de knop)
<div class="w-[200px] h-[39px] overflow-hidden rounded">
    <div id="google_button">
    </div>
</div>
In de JavaScript hierboven plaats ik dit terug naar een Controller actie genaamd Login. Hier pak ik de Google Auth aan.
      const xhr = new XMLHttpRequest();
                xhr.open('POST', '/login', true);
                xhr.setRequestHeader('Content-Type', 'application/json');
                xhr.onload = function () {
                    if (xhr.status === 200) {
                        window.location.reload();
                    } else {
                        console.error('Failed to log in.');
                    }
                };
                xhr.send(JSON.stringify({ idToken: response.credential }));
De Controller is hier' het is vrij eenvoudig het neemt gewoon de geposte JWT, decodeert het dan gebruikt dat om in te loggen op de app.
    [Route("login")]
        [HttpPost]
        public async Task<IActionResult> HandleGoogleCallback([FromBody] GoogleLoginRequest request)
        {
            var handler = new JwtSecurityTokenHandler();
            var jsonToken = handler.ReadToken(request.IdToken) as JwtSecurityToken;

            if (jsonToken == null)
            {
                return BadRequest("Invalid token");
            }

            var claimsIdentity = new ClaimsIdentity(
                jsonToken.Claims,
                GoogleDefaults.AuthenticationScheme);

            var authProperties = new AuthenticationProperties
            {
                IsPersistent = true
            };

            await HttpContext.SignInAsync(
                CookieAuthenticationDefaults.AuthenticationScheme,
                new ClaimsPrincipal(claimsIdentity),
                authProperties);

            return Ok();
        }
    }
OPMERKING: Dit is niet prefect als het assess up van de claim namen (ze zijn allemaal klein geval) maar het werkt voor nu.
In mijn BaseController haal ik de eigenschappen die ik nodig heb;
      public record LoginData(bool loggedIn, string? name, string? avatarUrl, string? identifier);

    protected LoginData GetUserInfo()
    {
        var authenticateResult = HttpContext.AuthenticateAsync(CookieAuthenticationDefaults.AuthenticationScheme).Result;
        if (authenticateResult.Succeeded)
        {
            var principal = authenticateResult.Principal;
            if(principal == null)
            {
                return new LoginData(false, null, null, null);
            }
            var name = principal.FindFirst("name").Value;
            var avatarUrl =principal.FindFirst("picture").Value;
            var nameIdentifier = principal.FindFirst("sub");
            return new LoginData(true, name, avatarUrl, nameIdentifier?.Value);
        }
        return new LoginData(false,null,null,null);
    }
En dat is het! Hiermee kunt u Google Authentication gebruiken zonder gebruik te maken van de ASP.NET Identity database.
